Woodworking takes on many forms. Sometimes it is a more elaborate piece like a mid-century modern cabinet, sometimes it is a big piece like a 10-foot window seat bench with side cabinets. But, sometimes it is just a simple thing like an owl house.
I enjoy building owl houses. While the design is simple, building it is a multi-step process that I can get lost in doing. Because it is a simple design, building an owl house can be done in two days. If we want to make it more elaborate, a build can take a few days. A big chunk of time is spent milling the wood and waiting for the glue to dry.
Broadly, the process of building the owl house involves:
- Create design/plans and cut list.
- The cut list starts with full size lumber and diagrams the cut lines for the parts
- Using a cut list ensures starting with enough rough lumber
- Select the lumber.
- The owl house is made from cedar picket fence board
- Very rough lumber: different thickness and width
- Cedar is naturally weather resistant
- Mill the lumber: clean up and straighten edges
- Cut parts
- Glue panels for sides, top, and bottom
- Assemble owl house
- Cut the 3.5 radius hole and sqaure off bottom
- Add mounting board and mount.
The owl house can be made using different types of wood. Cedar is naturally weather resistant and good for bird and owl houses. The trouble is that it is also inconsistent and the edges are not actually flat or true. This causes issues when gluing up panels.
To correct this, I made a simple jointing jig for my table saw that allowed me to cut one side of each board straight and square. This side then became the reference surface on the table saw fence to cut the opposite side. This provides two good surfaces for gluing up the panels.
If the sides are not straight and square, the glue will not have proper surfaces to adhere together. The boards of the panel may hold but the bond will be weak and prone to break.
Because I don’t have a long enough jig for the full length lumber, I had to joint the boards after they were cut to their shorter lengths.
Cutting the boards to length
The cedar boards are cut to roughly 23 inches. This should be close, but doesn’t have to be exact as long as all boards for the front, back and side are the same.
Three boards each for the floor and top are cut to 13 inches and 17 inches respectively.
Cleaning up the edges
This is when the jointing with the table saw jig. If I had a longer jointing jig, I’d have cleaned up the face-grain edges.
Panel Glue Up
The panel glue up consists of three boards glued at face grain edges.
Before gluing the boards, it helps to dry-fit the boards in various combinations to see what looks and fits best. Generally, the fit from board to board should be good, but these are rough cedar planks.
So, while we cleaned up the face grain edges, we did not plane the boards to the same thickness, did not finish the face or address any twisting. Cedar fence boards tend not to be too bad so they glue up pretty well; certainly not furniture quality, but great for owl houses.
Using TiteBond 3 exterior glue, the panels are glued up. Across the boards is a brace to keep them from buckling under the pressure of the clamp.


Cutting the Panels to Final Dimensions
The next step is cutting the panels to 13 inch width. The rough panels are about 16 or so inches wide. While we can simply cust 3 inches off one side, the panels will not be symmetrical. Yes, it’s just an owl house and will be outside, but there is something about symmetry that is appealing.
So, I cut 1.5 inches from one side. Then using that side as the reference side on the table saw fence, cut the board to the final 13 inch width. This leaves us with two 1.5 inch strips and the 13 inch panel. This is done with all the panels.
The 1.5 inch strips will be cut to 13 inches and used as braces on the top and bottom inside the side panels. The top brace should run flush along the top edge of the sides. The bottom brace should be roughly ⅝ to ¾ inch up from the bottom to leave room for the bottom panel. These will provide support for the mounting board that is added to the outside of the box.
Assembling the Owl House
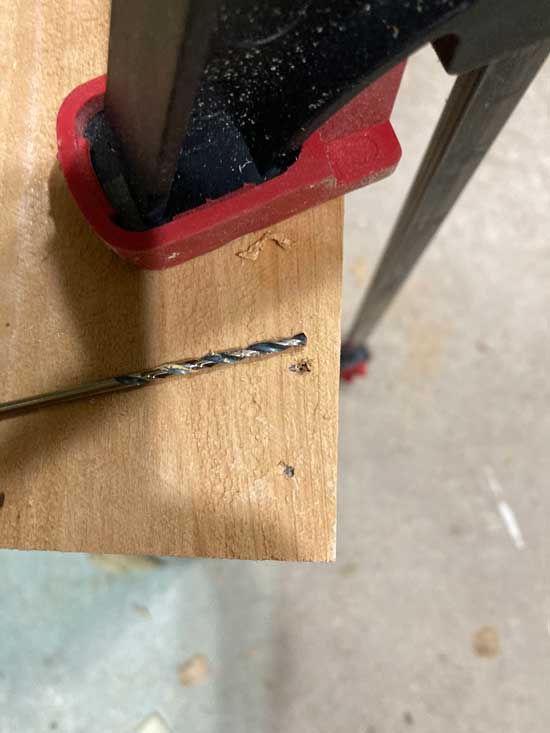
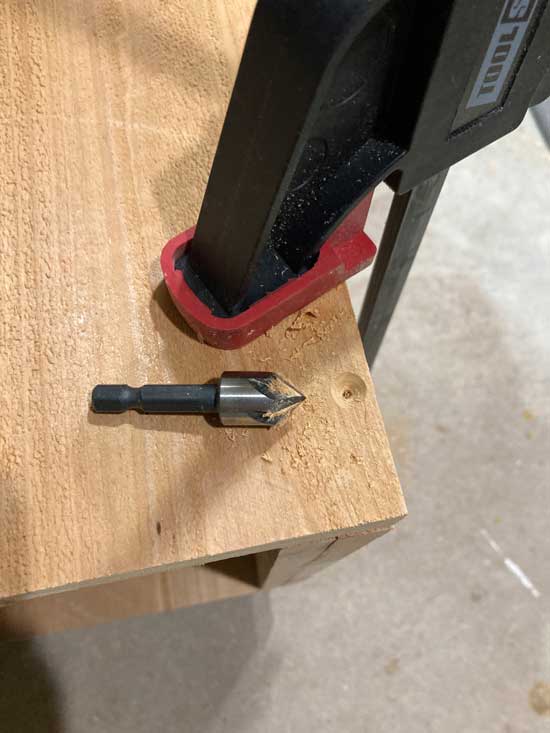
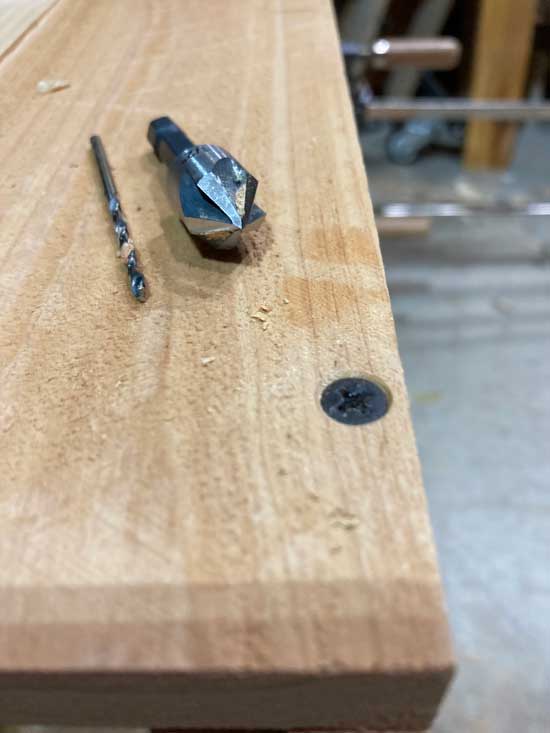
The side panels are glued with TiteBond 3 exterior glue and clamped. Then they are also fastened with screws. To minimize cracking and make it look better, the screw holes are pre-drill and countersink drilled.
As part of the side panel assembly, the bottom panel is also cust to final dimensions to fit in the panels. Because the panels are made from slightly rough boards, there may be some unevenness in the bottom opening. So, we have to cut the bottom, adjusting for some variations in the opening dimensions.
When the glue dries, remove the clamps.
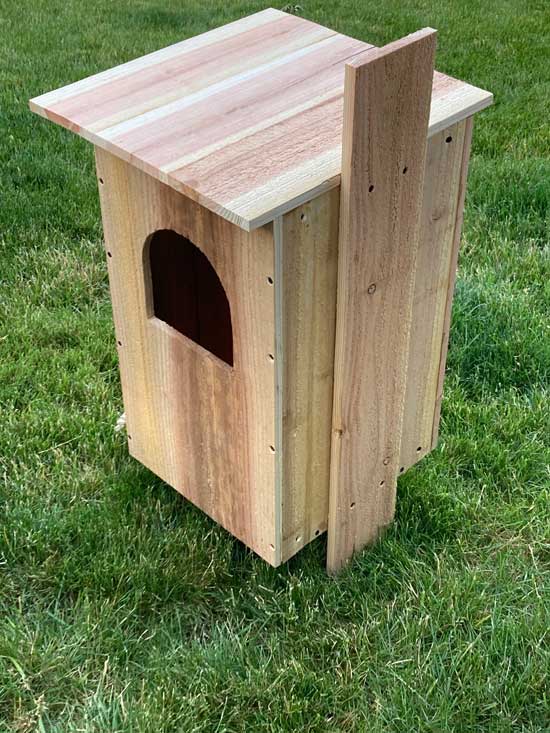
Choosing which panel becomes the front is the next step. Then marking out the hole placement. The top is ½ circle that starts about 4 inches from the top. The bottom square is about 12 inches from the bottom. The half circle is 3.5 inch radius. This is cut using a jigsaw.
Then we add the top. It covers from side to side (13 inches), and from the back to overhanging the front by a few inches. It is glued to the top of the side, front & back panels. The top is also glued to the braces and is screwed into these as well. The top is also clamped until the glue dries.


When ready to put the owl house up, select which side will mount to the post, tree or structure. On this side, add the post board with Glue and screws.
Below is a rough plan for the owl house. The top shows overhang on side as well as front. I eleminated the side overhang.
